As an instructor, you can create a discussion for your course. This lesson outlines a variety of options to choose from in order to customize a discussion for your course.
Note: Discussions can be graded or ungraded. If a student attaches a file to an ungraded discussion, the file size counts toward the student's storage quotas. However, attachments added to graded discussions do not count toward the student's storage quotas.
Open Discussions
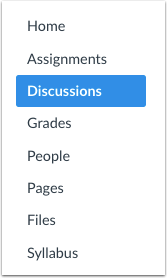
In Course Navigation, click the Discussions link.
Add Discussion

Click the Add Discussion button.
Create Discussion

In the Title field [1], create a title for your discussion.
Use the Rich Content Editor [2] to create content for your discussion. You can also add links, files, and images to the discussion using the content selector [3].
You can also add an attachment to your discussion by clicking the Choose File button [4].
Add Discussion Options

By default, discussions are created as focused discussions. To create a threaded discussion, click the Allow threaded replies checkbox [1].
To require users to reply to the discussion before they can see any other replies, click the Users must post before seeing replies checkbox [2].
To enable a discussion podcast feed, click the Enable podcast feed checkbox [3].
To create a graded discussion, click the Graded checkbox [4]. You can assign graded discussions to everyone, individual students, course sections, or course groups.
To allow students to like discussion replies, click the Allow liking checkbox [5].
To make the discussion a group discussion, click the This is a Group Discussion checkbox [6].
To make your discussion available on a specific date or during a specific date range, enter the dates in the Available From and Until fields [7], or click the calendar icons to select dates. Note that these fields only apply for non-graded discussions; If you create a graded discussion, these date fields do not apply.
Save and Publish

If you are ready to publish your discussion, click the Save & Publish button [1]. If you want to create a draft of your discussion and publish it later, click the Save button [2].

When your discussion is saved in a draft state, you can return to the page and publish it at any time by clicking the Publish icon.
View Discussion

View the discussion.
Comments
0 comments
Article is closed for comments.